Flutter Counter
Este conteúdo não está disponível em sua língua ainda.
![]()
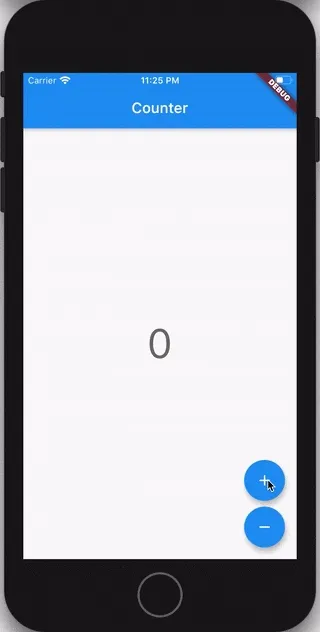
In the following tutorial, we’re going to build a Counter in Flutter using the Bloc library.
Key Topics
Section titled “Key Topics”- Observe state changes with BlocObserver.
- BlocProvider, Flutter widget which provides a bloc to its children.
- BlocBuilder, Flutter widget that handles building the widget in response to new states.
- Using Cubit instead of Bloc. What’s the difference?
- Adding events with context.read.
We’ll start off by creating a brand new Flutter project
flutter create flutter_counterWe can then go ahead and replace the contents of pubspec.yaml with
name: flutter_counterdescription: A new Flutter project.version: 1.0.0+1publish_to: none
environment:  sdk: ">=3.8.0 <4.0.0"
dependencies:  bloc: ^9.0.0  flutter:    sdk: flutter  flutter_bloc: ^9.1.0
dev_dependencies:  bloc_lint: ^0.2.0-dev.0  bloc_test: ^10.0.0  flutter_test:    sdk: flutter  integration_test:    sdk: flutter  mocktail: ^1.0.0
flutter:  uses-material-design: true
and then install all of our dependencies
flutter pub getProject Structure
Section titled “Project Structure”├── lib│ ├── app.dart│ ├── counter│ │ ├── counter.dart│ │ ├── cubit│ │ │ └── counter_cubit.dart│ │ └── view│ │ ├── counter_page.dart│ │ ├── counter_view.dart│ │ └── view.dart│ ├── counter_observer.dart│ └── main.dart├── pubspec.lock├── pubspec.yamlThe application uses a feature-driven directory structure. This project structure enables us to scale the project by having self-contained features. In this example we will only have a single feature (the counter itself) but in more complex applications we can have hundreds of different features.
BlocObserver
Section titled “BlocObserver”The first thing we’re going to take a look at is how to create a BlocObserver
which will help us observe all state changes in the application.
Let’s create lib/counter_observer.dart:
import 'package:bloc/bloc.dart';
/// {@template counter_observer}/// [BlocObserver] for the counter application which/// observes all state changes./// {@endtemplate}class CounterObserver extends BlocObserver {  /// {@macro counter_observer}  const CounterObserver();
  @override  void onChange(BlocBase<dynamic> bloc, Change<dynamic> change) {    super.onChange(bloc, change);    // ignore: avoid_print    print('${bloc.runtimeType} $change');  }}
In this case, we’re only overriding onChange to see all state changes that
occur.
main.dart
Section titled “main.dart”Next, let’s replace the contents of lib/main.dart with:
import 'package:bloc/bloc.dart';import 'package:flutter/widgets.dart';import 'package:flutter_counter/app.dart';import 'package:flutter_counter/counter_observer.dart';
void main() {  Bloc.observer = const CounterObserver();  runApp(const CounterApp());}
We’re initializing the CounterObserver we just created and calling runApp
with the CounterApp widget which we’ll look at next.
Counter App
Section titled “Counter App”Let’s create lib/app.dart:
CounterApp will be a MaterialApp and is specifying the home as
CounterPage.
import 'package:flutter/material.dart';import 'package:flutter_counter/counter/counter.dart';
/// {@template counter_app}/// A [MaterialApp] which sets the `home` to [CounterPage]./// {@endtemplate}class CounterApp extends MaterialApp { /// {@macro counter_app} const CounterApp({super.key}) : super(home: const CounterPage());}Let’s take a look at CounterPage next!
Counter Page
Section titled “Counter Page”Let’s create lib/counter/view/counter_page.dart:
The CounterPage widget is responsible for creating a CounterCubit (which we
will look at next) and providing it to the CounterView.
import 'package:flutter/material.dart';import 'package:flutter_bloc/flutter_bloc.dart';import 'package:flutter_counter/counter/counter.dart';
/// {@template counter_page}/// A [StatelessWidget] which is responsible for providing a/// [CounterCubit] instance to the [CounterView]./// {@endtemplate}class CounterPage extends StatelessWidget {  /// {@macro counter_page}  const CounterPage({super.key});
@override Widget build(BuildContext context) { return BlocProvider( create: (_) => CounterCubit(), child: const CounterView(), ); }}Counter Cubit
Section titled “Counter Cubit”Let’s create lib/counter/cubit/counter_cubit.dart:
The CounterCubit class will expose two methods:
increment: adds 1 to the current statedecrement: subtracts 1 from the current state
The type of state the CounterCubit is managing is just an int and the
initial state is 0.
import 'package:bloc/bloc.dart';
/// {@template counter_cubit}/// A [Cubit] which manages an [int] as its state./// {@endtemplate}class CounterCubit extends Cubit<int> {  /// {@macro counter_cubit}  CounterCubit() : super(0);
  /// Add 1 to the current state.  void increment() => emit(state + 1);
/// Subtract 1 from the current state. void decrement() => emit(state - 1);}Next, let’s take a look at the CounterView which will be responsible for
consuming the state and interacting with the CounterCubit.
Counter View
Section titled “Counter View”Let’s create lib/counter/view/counter_view.dart:
The CounterView is responsible for rendering the current count and rendering
two FloatingActionButtons to increment/decrement the counter.
import 'package:flutter/material.dart';import 'package:flutter_bloc/flutter_bloc.dart';import 'package:flutter_counter/counter/counter.dart';
/// {@template counter_view}/// A [StatelessWidget] which reacts to the provided/// [CounterCubit] state and notifies it in response to user input./// {@endtemplate}class CounterView extends StatelessWidget {  /// {@macro counter_view}  const CounterView({super.key});
  @override  Widget build(BuildContext context) {    final textTheme = Theme.of(context).textTheme;    return Scaffold(      body: Center(        child: BlocBuilder<CounterCubit, int>(          builder: (context, state) {            return Text('$state', style: textTheme.displayMedium);          },        ),      ),      floatingActionButton: Column(        mainAxisAlignment: MainAxisAlignment.end,        crossAxisAlignment: CrossAxisAlignment.end,        children: <Widget>[          FloatingActionButton(            key: const Key('counterView_increment_floatingActionButton'),            child: const Icon(Icons.add),            onPressed: () => context.read<CounterCubit>().increment(),          ),          const SizedBox(height: 8),          FloatingActionButton(            key: const Key('counterView_decrement_floatingActionButton'),            child: const Icon(Icons.remove),            onPressed: () => context.read<CounterCubit>().decrement(),          ),        ],      ),    );  }}
A BlocBuilder is used to wrap the Text widget in order to update the text
any time the CounterCubit state changes. In addition,
context.read<CounterCubit>() is used to look-up the closest CounterCubit
instance.
Barrel
Section titled “Barrel”Create lib/counter/view/view.dart:
Add view.dart to export all public facing parts of counter view.
export 'counter_page.dart';export 'counter_view.dart';Let’s create lib/counter/counter.dart:
Add counter.dart to export all the public facing parts of the counter feature.
export 'cubit/counter_cubit.dart';export 'view/view.dart';That’s it! We’ve separated the presentation layer from the business logic layer.
The CounterView has no idea what happens when a user presses a button; it just
notifies the CounterCubit. Furthermore, the CounterCubit has no idea what is
happening with the state (counter value); it’s simply emitting new states in
response to the methods being called.
We can run our app with flutter run and can view it on our device or
simulator/emulator.
The full source (including unit and widget tests) for this example can be found here.