AngularDart Counter
This content is not available in your language yet.
![]()
In the following tutorial, we’re going to build a Counter in AngularDart using the Bloc library.
We’ll start off by creating a brand new AngularDart project with stagehand.
If you don’t have stagehand installed, activate it via:
dart pub global activate stagehandThen generate a new project via:
stagehand web-angularWe can then go ahead and replace the contents of pubspec.yaml with:
name: angular_counterdescription: A web app that uses angular_bloc
environment:  sdk: ">=3.8.0 <4.0.0"
dependencies:  angular_bloc: ^10.0.0-dev.5  bloc: ^9.0.0  ngdart: ^8.0.0-dev.4
dev_dependencies:  bloc_lint: ^0.2.0-dev.0  build_daemon: ^4.0.0  build_runner: ^2.0.0  build_web_compilers: ^4.0.0
and then install all of our dependencies
dart pub getOur counter app is just going to have two buttons to increment/decrement the
counter value and an element to display the current value. Let’s get started
designing the CounterEvents.
Counter Bloc
Section titled “Counter Bloc”Since our counter’s state can be represented by an integer we don’t need to create a custom class and we can co-locate the events and bloc.
import 'package:bloc/bloc.dart';
/// Base counter event.sealed class CounterEvent {}
/// Notifies bloc to increment state.final class CounterIncrementPressed extends CounterEvent {}
/// Notifies bloc to decrement state.final class CounterDecrementPressed extends CounterEvent {}
/// {@template counter_bloc}/// A simple [Bloc] that manages an `int` as its state./// {@endtemplate}class CounterBloc extends Bloc<CounterEvent, int> { /// {@macro counter_bloc} CounterBloc() : super(0) { on<CounterIncrementPressed>((event, emit) => emit(state + 1)); on<CounterDecrementPressed>((event, emit) => emit(state - 1)); }}Counter App
Section titled “Counter App”Now that we have our CounterBloc fully implemented, we can get started
creating our AngularDart App Component.
Our app.component.dart should look like:
import 'package:angular_counter/src/counter_page/counter_page_component.dart';import 'package:ngdart/angular.dart';
/// Top level application component.@Component(  selector: 'my-app',  templateUrl: 'app_component.html',  directives: [CounterPageComponent],)class AppComponent {}
and our app.component.html should look like:
<counter-page></counter-page>Counter Page
Section titled “Counter Page”Finally, all that’s left is to build our Counter Page Component.
Our counter_page_component.dart should look like:
import 'package:angular_bloc/angular_bloc.dart';import 'package:angular_counter/src/counter_page/counter_bloc.dart';import 'package:ngdart/angular.dart';
/// {@template counter_page}/// Counter page component which renders a counter/// and allows users to increment/decrement the counter./// {@endtemplate}@Component(  selector: 'counter-page',  templateUrl: 'counter_page_component.html',  styleUrls: ['counter_page_component.css'],  providers: [ClassProvider(CounterBloc)],  pipes: [BlocPipe],)class CounterPageComponent implements OnDestroy {  /// {@macro counter_page}  const CounterPageComponent(this.counterBloc);
  /// The associated [CounterBloc] which manages the count.  final CounterBloc counterBloc;
  @override  void ngOnDestroy() {    counterBloc.close();  }
  /// Increment the count.  void increment() => counterBloc.add(CounterIncrementPressed());
/// Decrement the count. void decrement() => counterBloc.add(CounterDecrementPressed());}Lastly, our counter_page_component.html should look like:
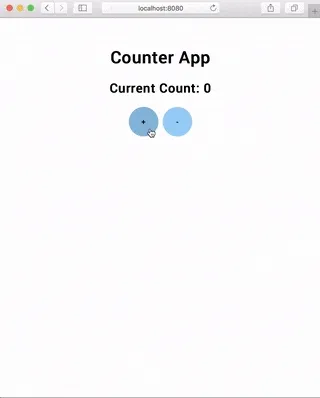
<div class="counter-page-container"> <h1>Counter App</h1> <h2>Current Count: {{ $pipe.bloc(counterBloc) }}</h2> <button class="counter-button" (click)="increment()">➕</button> <button class="counter-button" (click)="decrement()">➖</button></div>That’s it! We’ve separated our presentation layer from our business logic layer.
Our CounterPageComponent has no idea what happens when a user presses a
button; it just adds an event to notify the CounterBloc. Furthermore, our
CounterBloc has no idea what is happening with the state (counter value); it’s
simply converting the CounterEvents into integers.
We can run our app with webdev serve and can view it locally.
The full source for this example can be found here.